Please note this guide is updated regularly – Last Updated 8th April 2016
If you follow this guide and want to add or contribute to pictures/guide, please contact us.
- Remove Props and pull apart Falcon 250
- Download OpenPilot GCS 15.02.02, You may also need the STM32 Virtual Com Port driver.
- Install the Cleanflight Configurator from the Chrome Web Store.
- Download Cleanflight 1.10 firmware .bin or Latest Betaflight CC3D BIN File from here
NOTE: You need .bin file – so thats why we have put Cleanflight 1.10 ONLY, versions after this do not have .bin file.
For difference on Cleanflight vs Betaflight view this article. - On openpilot and open the firmware tab. Click rescue then plug in your Racer to computer via USB (no power)
- Click open and select .bin that you downloaded.
- Click the checkbox, I know what I’m doing!
- Click Flash
- WAIT TILL 100%
- MPORTANT! Leave usb plugged in and power the board via esc input
- Click boot (in same firmware window), motors will beep and wait till blue light on the cc3d is steadily blinking
- Close openpilot
- Unplug everything
- Open cleanflight
- Power your copter and plug usb back in now.
- Click connect. (if it fails, try changing the port)
- Congrats! You now are on Cleanflight. To connect your Falcon to Cleanflight you always need to use power now, plug in your battery!
- Place Copter on flat surface and under setup, click calibrate accelerometer.
- Change minimum throttle to 1050
- Change maximum throttle to 2000
- Click Save and reboot
- Now goto your PID tuning. Change your settings to the screenshot below. You need to Click Show all PIDs
MAKE SURE YOU CHANGE TO LUXFLOAT AT THE TOP FIRST before you change all the values.

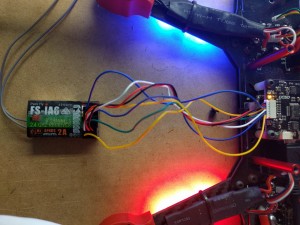
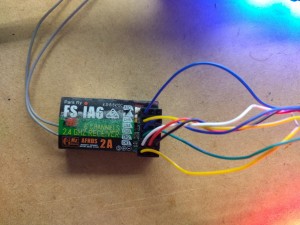
- Now goto receiver tab, and check all your transmitter channels are correct, they usually are different and you will need to reconfigure.If you have the Falcon RTF and have the I6 receiver, THIS IN THE MONEY PHOTO! This will save you so MUCH time by copying below cables.
-

 You may want to try the following changes as well if you do not have the above, or you can look on google images
Ch 1 moved to Ch3
Ch 3moved to Ch 5
Ch 4 moved to Ch 1
Ch 5 moved to Ch 4
(You may need to swap Ch 2 and Ch 4 around if your pitch and roll is incorrect. - Now on the right (still receiver tab) change throttle to 0.50, throttle EXPO to 0.00, RC rate to 1.00, RC expo 0.00 – Save
- Now you want to set up your AUX Switches, open the Modes Tab.
No mode selected = ACRO+ / Rate mode by default.
Altitude mode = Angle Mode
Rattitude mode = Horizon Mode
If you your switch only has two positions it would look something like this.

0 = Horizon Mode
1 = Acro/RateIf you have a switch that has 3 positions it may look like this.

0 = Angle
1 = Acro/rate
2=Horizon - Now save your settings. By moving your switches you should be able to test the setup. Green = mode activated, grey means Acro/Rate mode.
- Now we need to calibrate ESC, go to the motor tab. remember, you should have removed props at the start, if you didn’t, DO THIS NOW.
- Unplug battery
- Slide Master to MAX
- Plug in battery, wait for beeps.
- Slide Master to MIN
- ESC Calibration is now complete,however you must test that it has worked corectly.
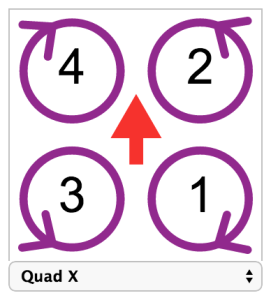
Arm copter, and all motors should spin at 0 throttle. If only some do, you need to redo the above steps until they are all spinning correctly. - You now need to swap motor configuration as clean flight configuration is different as per below.
LEFT is openpilot RIGHT is Cleanflight


- Copy and paste the below into the CLI tab.
mixer custom
mmix reset
mmix 0 1.0, 1.0, -0.93, -1.0
mmix 1 1.0, -1.0, -0.93, 1.0
mmix 2 1.0, -1.0, 0.93, -1.0
mmix 3 1.0, 1.0, 0.93, 1.0
save - Your cc3d will reboot. Give it a test flight! Make sure you are open space in case you missed a step and it crashes.

